Line Haul – Routes
Now we will explain the concept of the Line Haul, which is based on creating a Trip used to transfer a group of shipments from a source branch to a destination branch.
Shipments are linked to this trip so they can be tracked and their movement between branches can be monitored.
Routes
The first section we will explain in Line Haul is the Routes.
This section is used to create routes that define the starting and ending points of the shipment path.
How to Create a Route:
-
Click on Add Route.
-
Enter:
- Route Code
- Route Name (Arabic & English)
- Notes (if any)
-
Click Save.
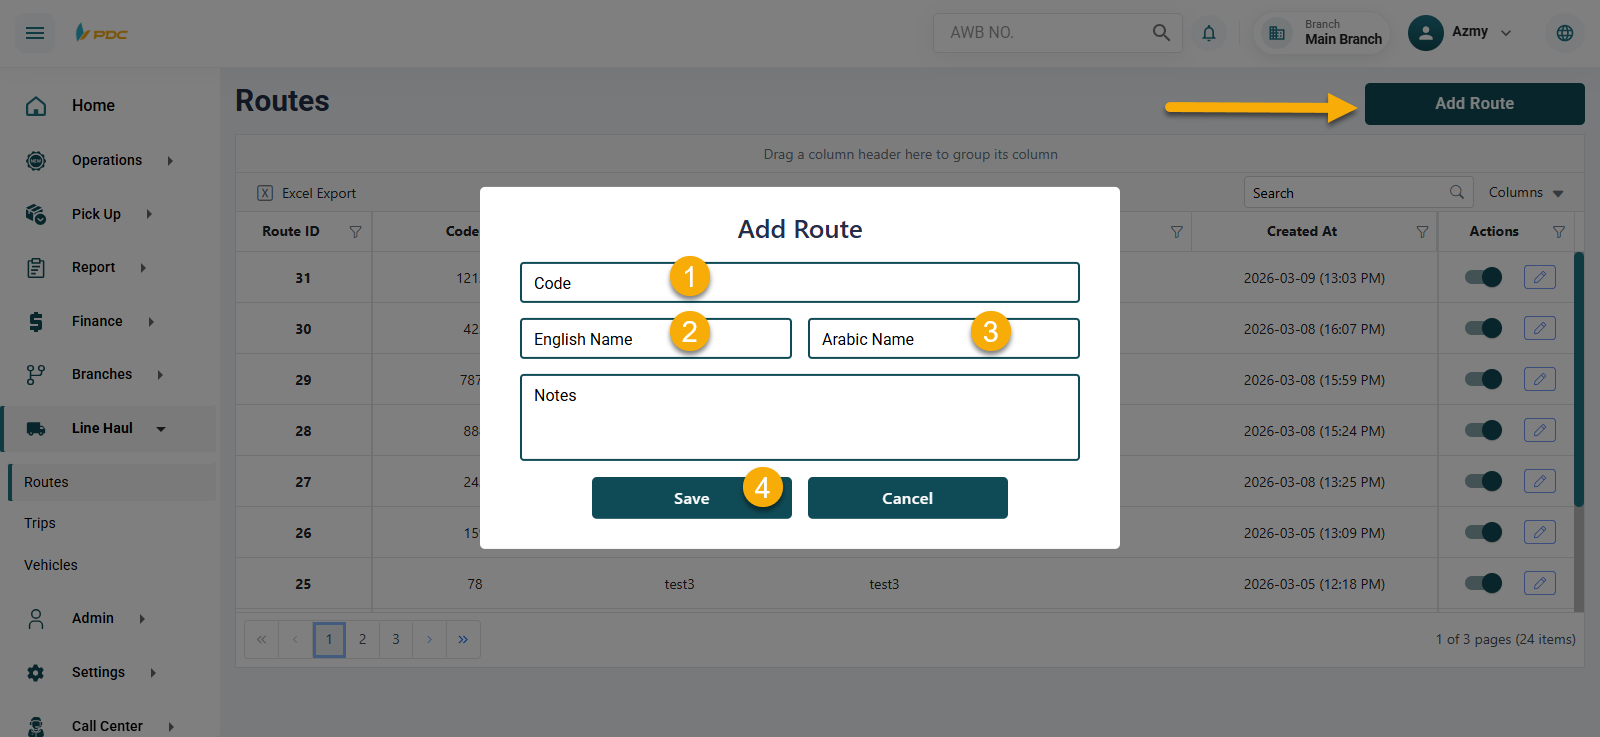
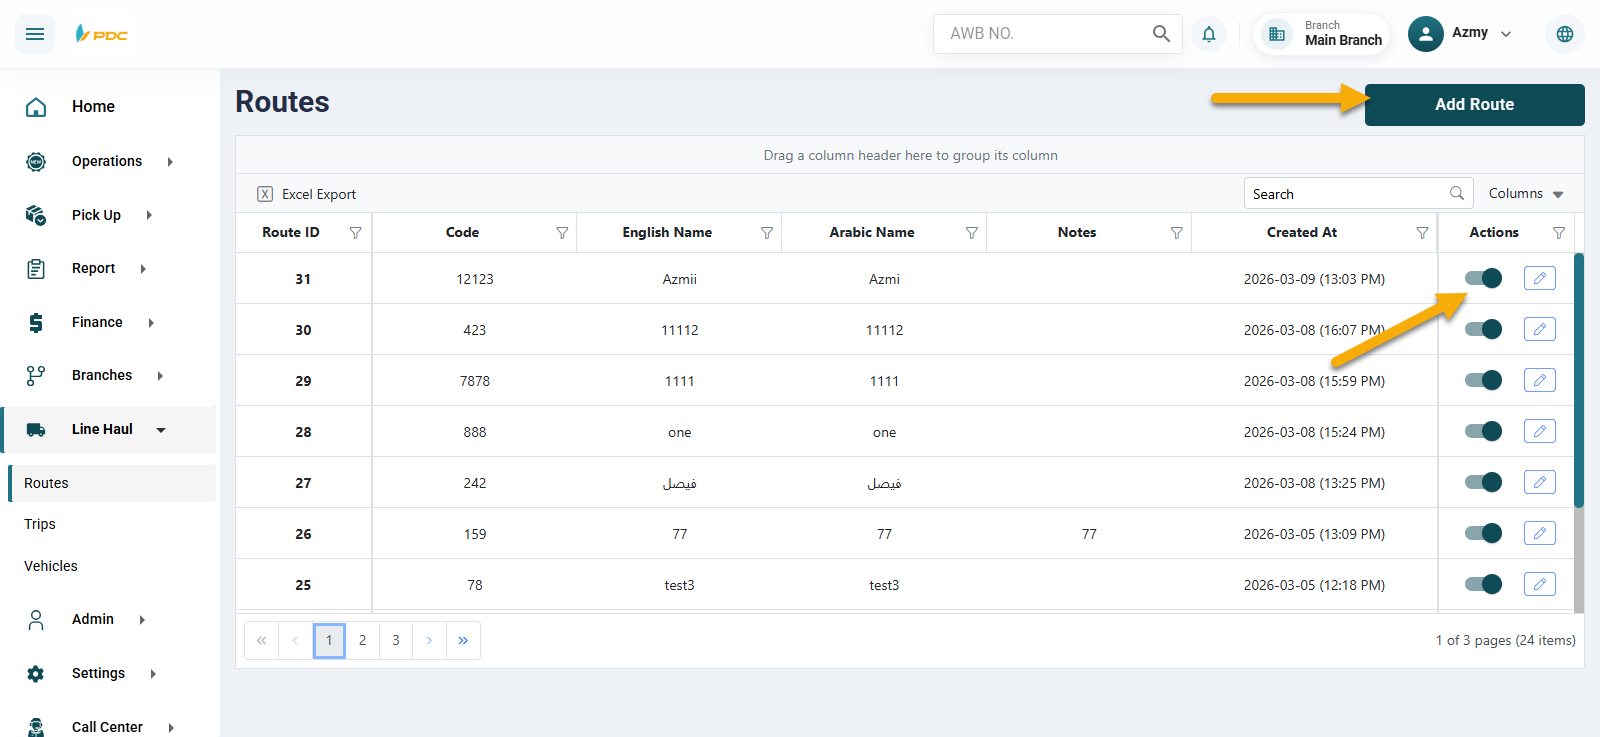
Once saved, the route will appear in the list.
Managing the Route
After creating the route, you can:
- Activate or deactivate the route
- Edit the route details
This can be done using the action buttons in the Actions column.
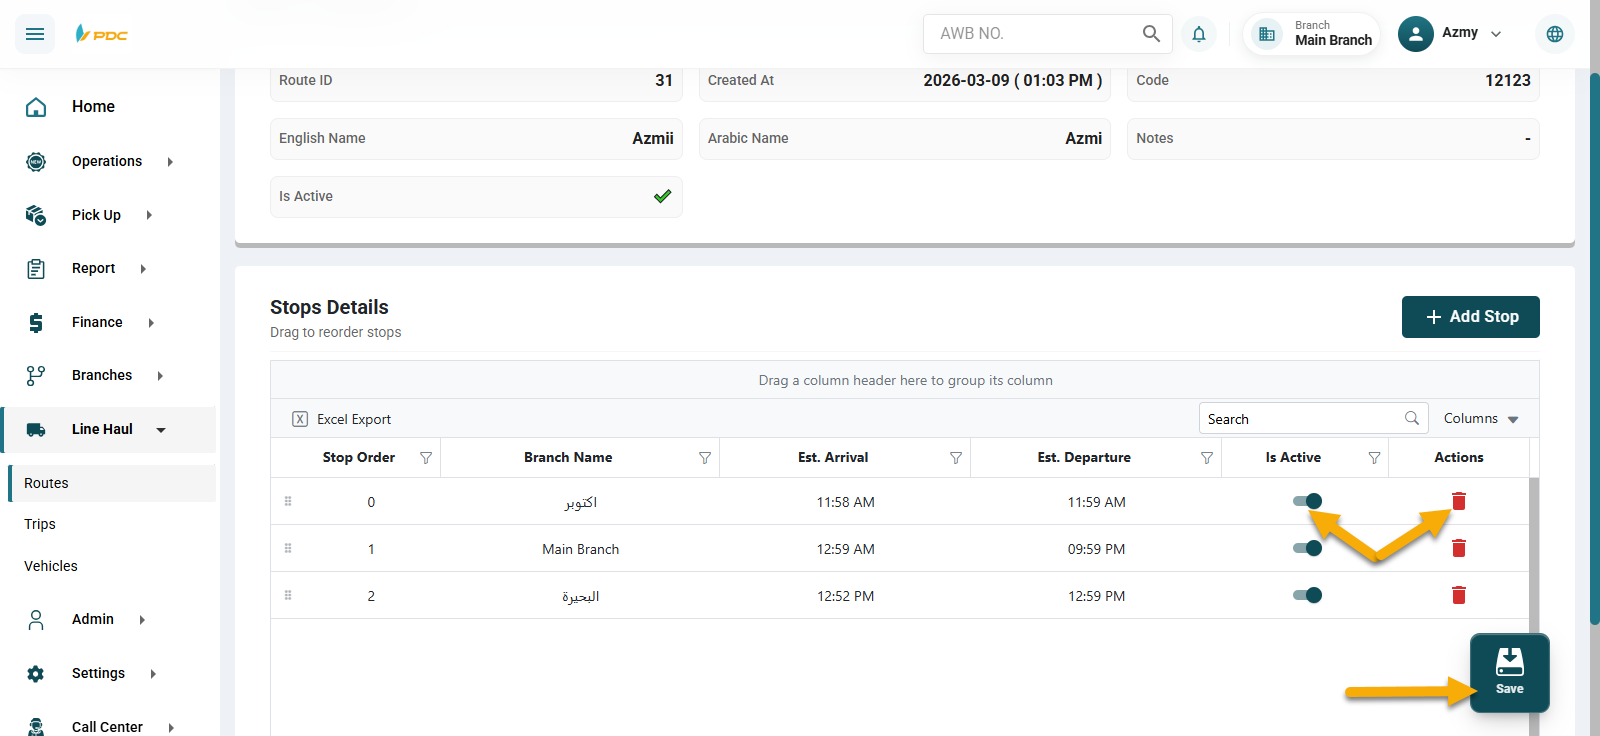
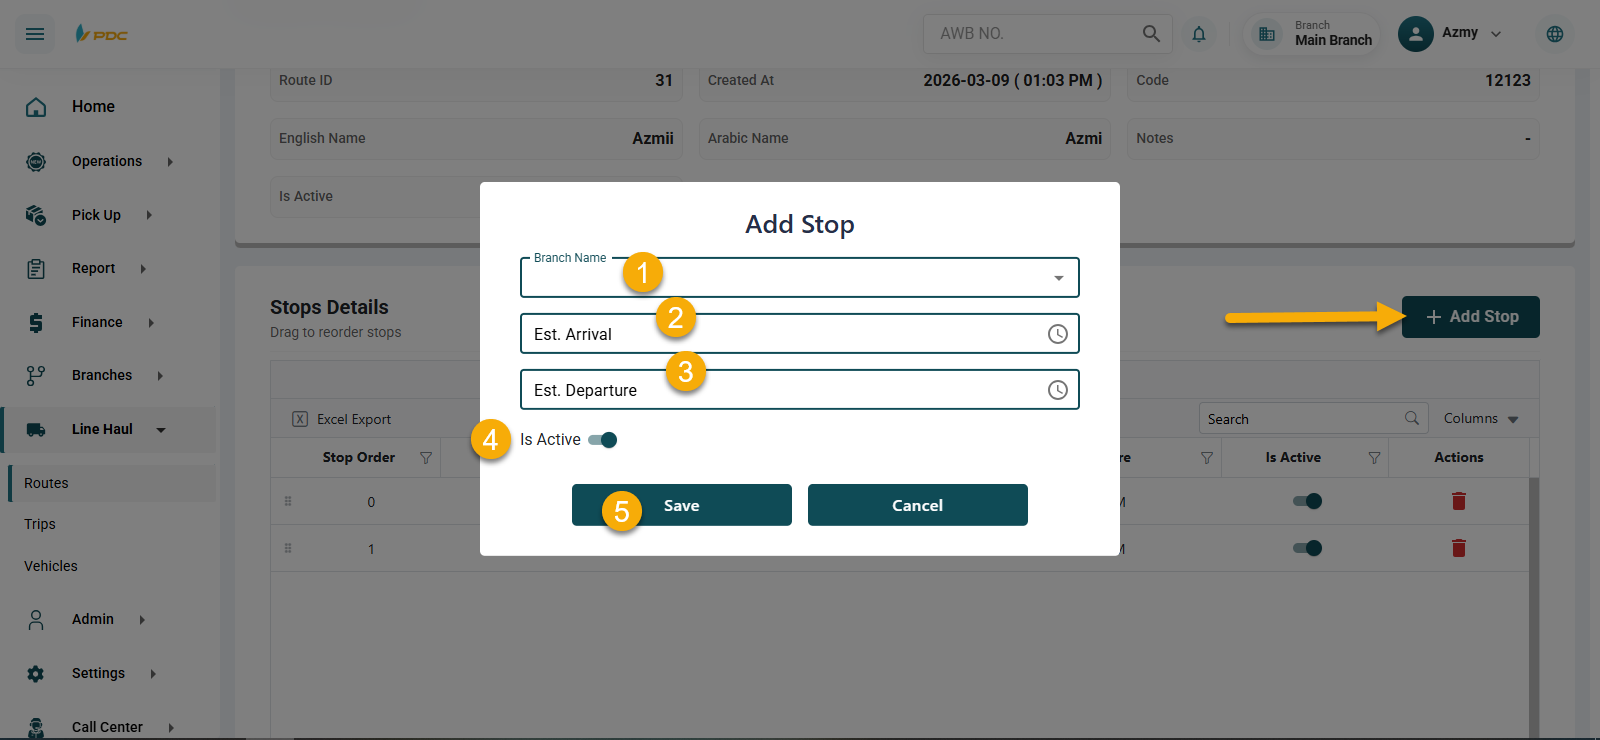
Adding Route Stops
To define the route path (start and stop points):
-
Click on the Route ID.
-
Click on Add Stop.
-
Enter the following:
- Select the Branch
- Set the Start Time
- Set the Expected Stop Time
- Activate the stop
-
Click Save, then click Save again on the left side of the screen.
Managing Stops
You can also:
- Activate or deactivate stops
- Delete stops
- Reorder stops using drag and drop