Branch Payments
The Branch Payments screen is designed to record and track cash collections that take place between different branches of the shipping company.
For example, the main branch may collect payments from one of the sub-branches, and this transaction is recorded here to ensure accuracy and transparency.
Access
From the Finance menu, select Branch Payments.
Page Sections
This screen contains two simple tables that help you easily track the status of payment transactions:
- Pending — Displays all transactions still in progress and awaiting confirmation.
- Posted — Displays transactions that have already been confirmed and completed.
Internal Actions
- New Collection: Click
New Payment. - Edit a pending transaction: From the
Actionscolumn, click theediticon. - Delete a pending transaction: From the
Actionscolumn, click thedeleteicon. - Post a pending transaction: From the
Actionscolumn, click the greenposticon.
New Branch Payment Screen
From the Finance menu ➡ Branch Payments ➡ click New Payment.
This will open the New Branch Payment screen, where you can choose either a branch or specific shipments.
and Creating a New Payment Using a Branch
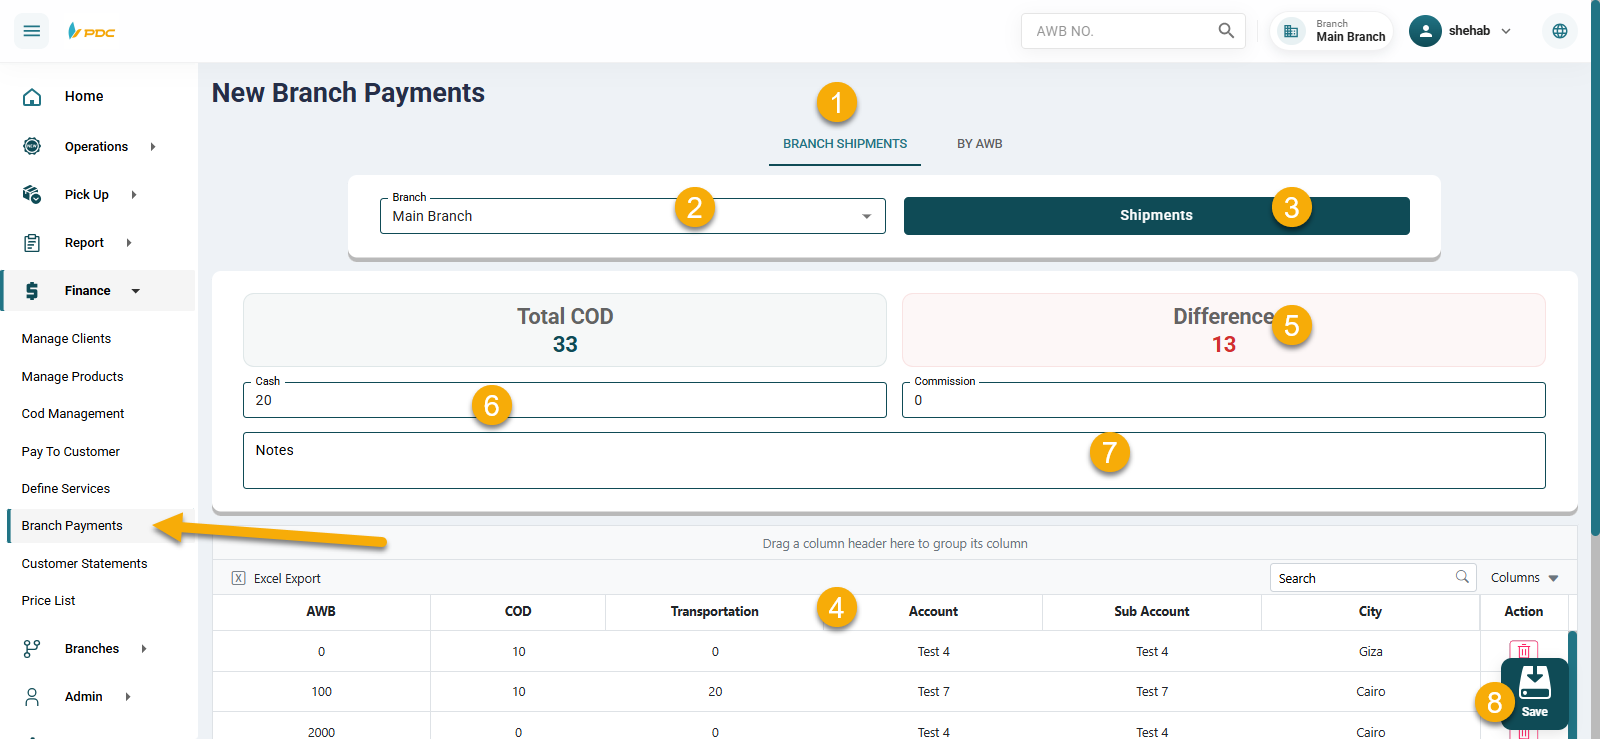
- Select the branch from the dropdown list.
- Click Shipments to display the total amounts due along with shipment details.
- Review the shipments linked to this branch — you can remove some if they are not yet due for settlement.
- After reviewing, you will see the total payable amount.
- Enter the amount paid in the Cash field.
- In the Other field, enter any deducted amounts and provide details in the Notes.
- Click Save to record the payment. You will be redirected back to the Branch Payments main screen, where the new payment will appear in the Pending table.
Posting a Branch Payment
From the Pending table, click the green confirmation icon in the Actions column for the required payment.
Once confirmed and posted, the payment will move to the Posted table, meaning the transaction has been successfully completed.