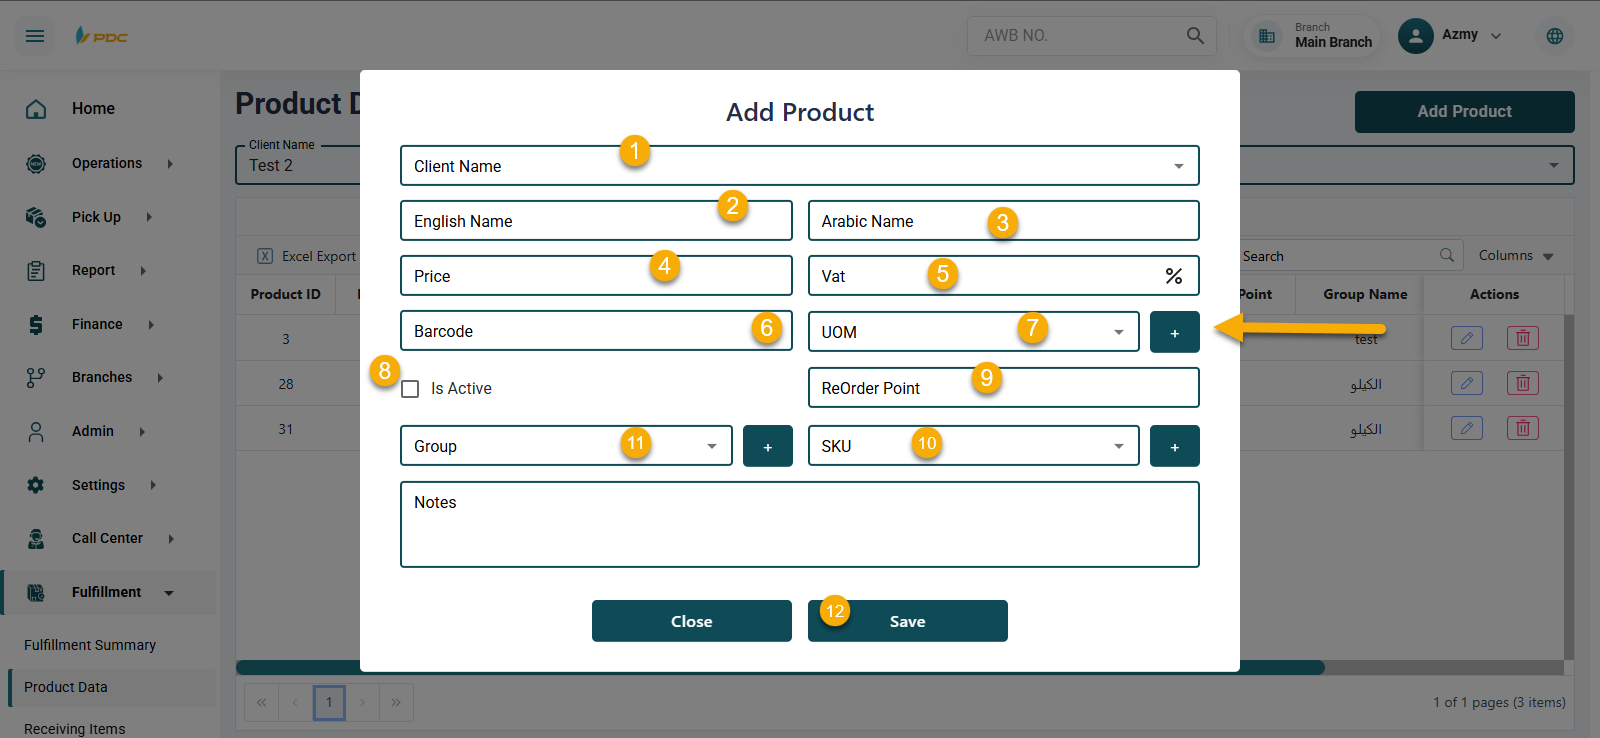
Item Data
The Item Data screen allows warehouse operations staff to add and manage products for each client within the system.
Upon accessing the screen, the operations staff will:
- Select the client for whom the products will be added.
- Click on Add Product, which opens the product data entry page.

On the Add Product page, the following information is entered:
- Product name in Arabic and English.
- Product barcode.
- Product price.
- Value Added Tax (VAT).
- Unit of Measure.
- Group.
- SKU.
Unit of Measure, Group, and SKU are added by clicking the ➕ Add icon next to each field.
Adding a Unit of Measure
When clicking the add icon next to Unit of Measure:
- A new screen appears.
- Select the client.
- Enter the unit name in Arabic and English.
- Click Save.
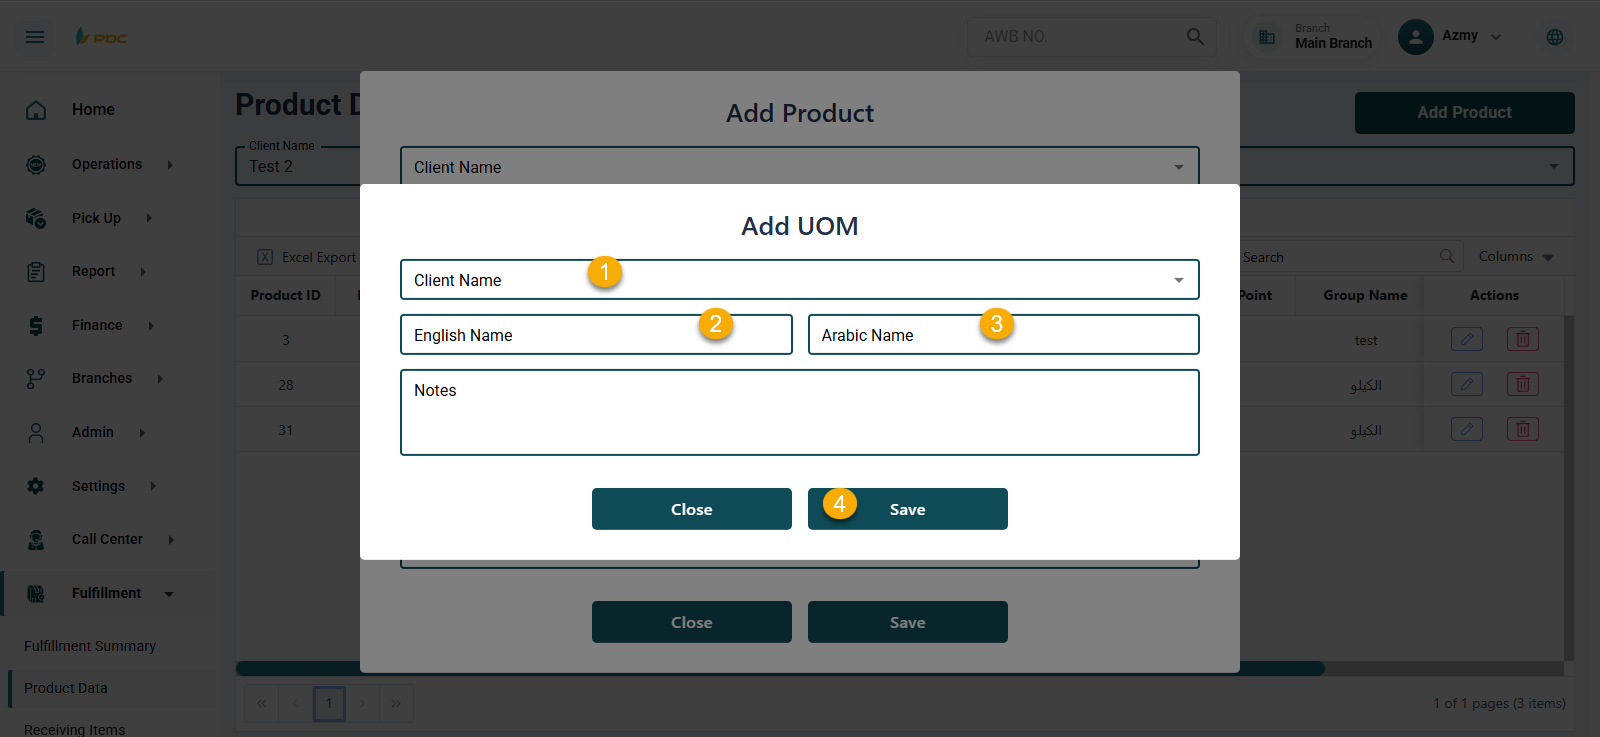
The newly added unit will then appear in the dropdown list and can be selected when adding a product.
Adding a Group
When clicking the add icon next to Group:
- A new page opens.
- Select the client.
- Enter the group name in Arabic and English.
- Click Save.
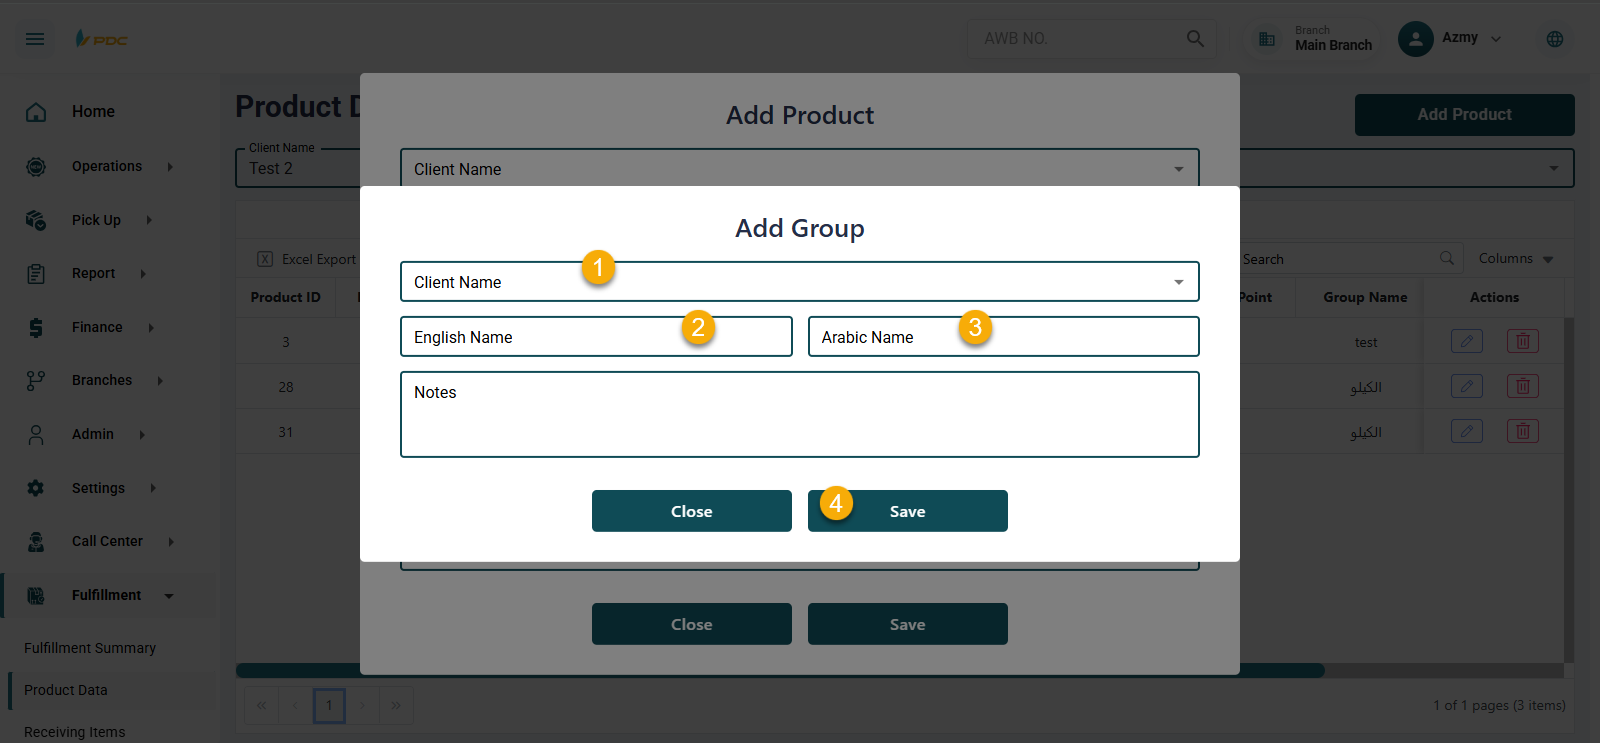
The group will then be available in the dropdown list for selection during product creation.
Adding an SKU
When clicking the add icon next to SKU:
-
The Add SKU page opens.
-
Select the client.
-
Enter the SKU attributes, such as:
- Width
- Length
- Height
- Color
- Type
- Style
- Size
-
Click Save.
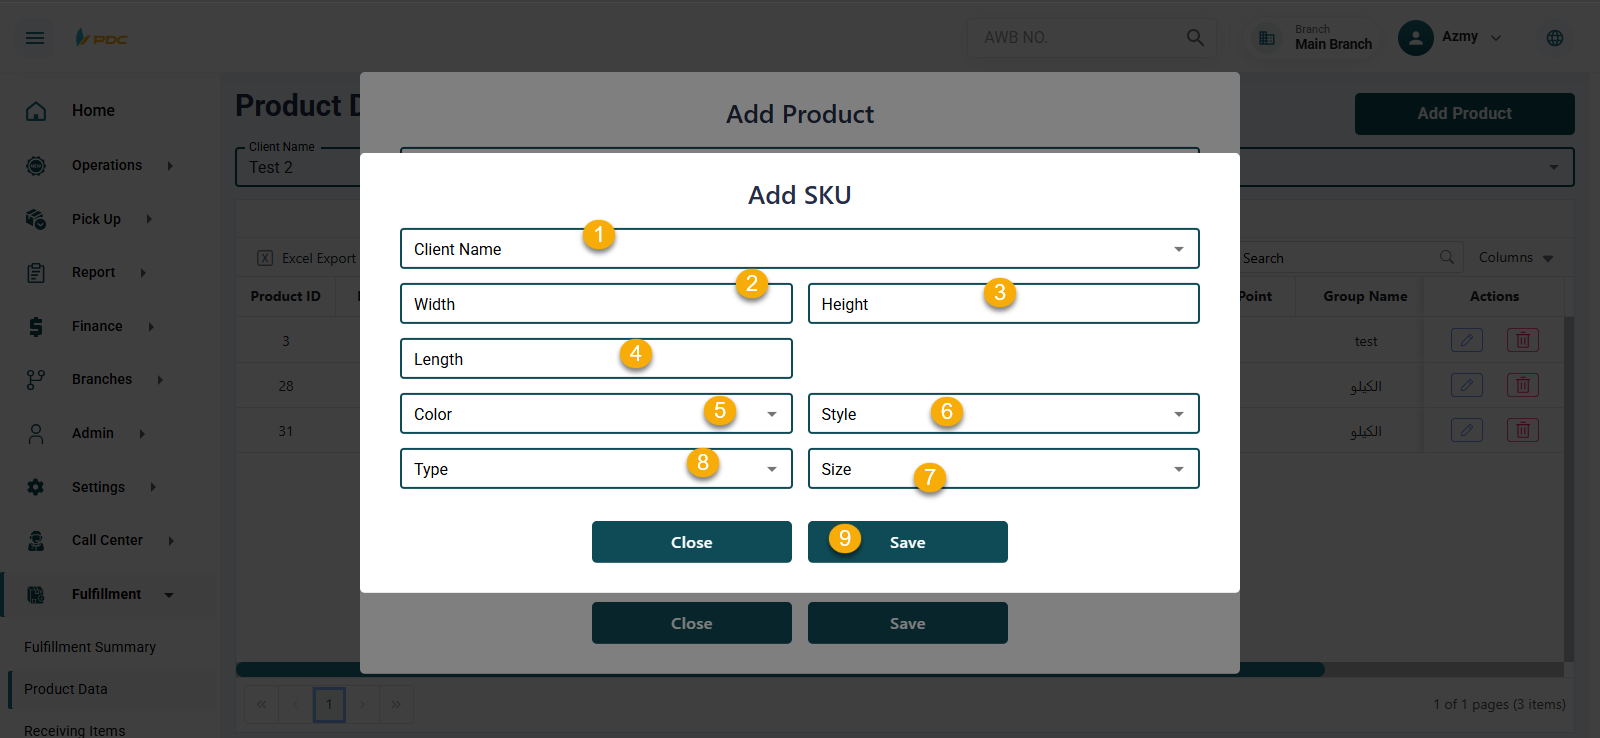
The SKU will appear in the dropdown list and can be selected when adding the product.
After completing all required fields, click Save to successfully add the product to the selected client.
The system also allows users to:
- Edit product details.
- Delete products from the client’s product list when needed.
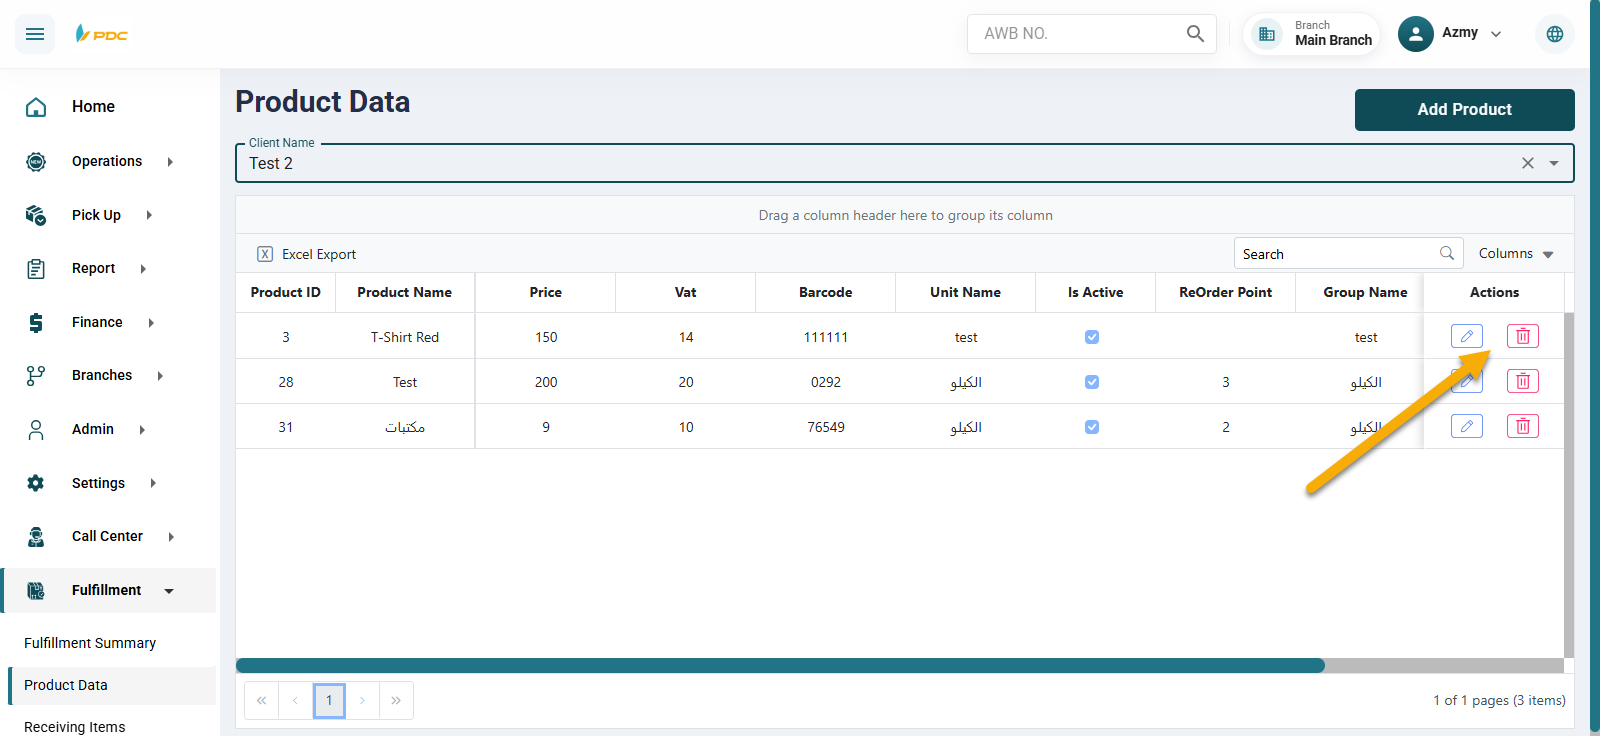
This screen helps ensure accurate product management, proper client association, and efficient warehouse inventory tracking.