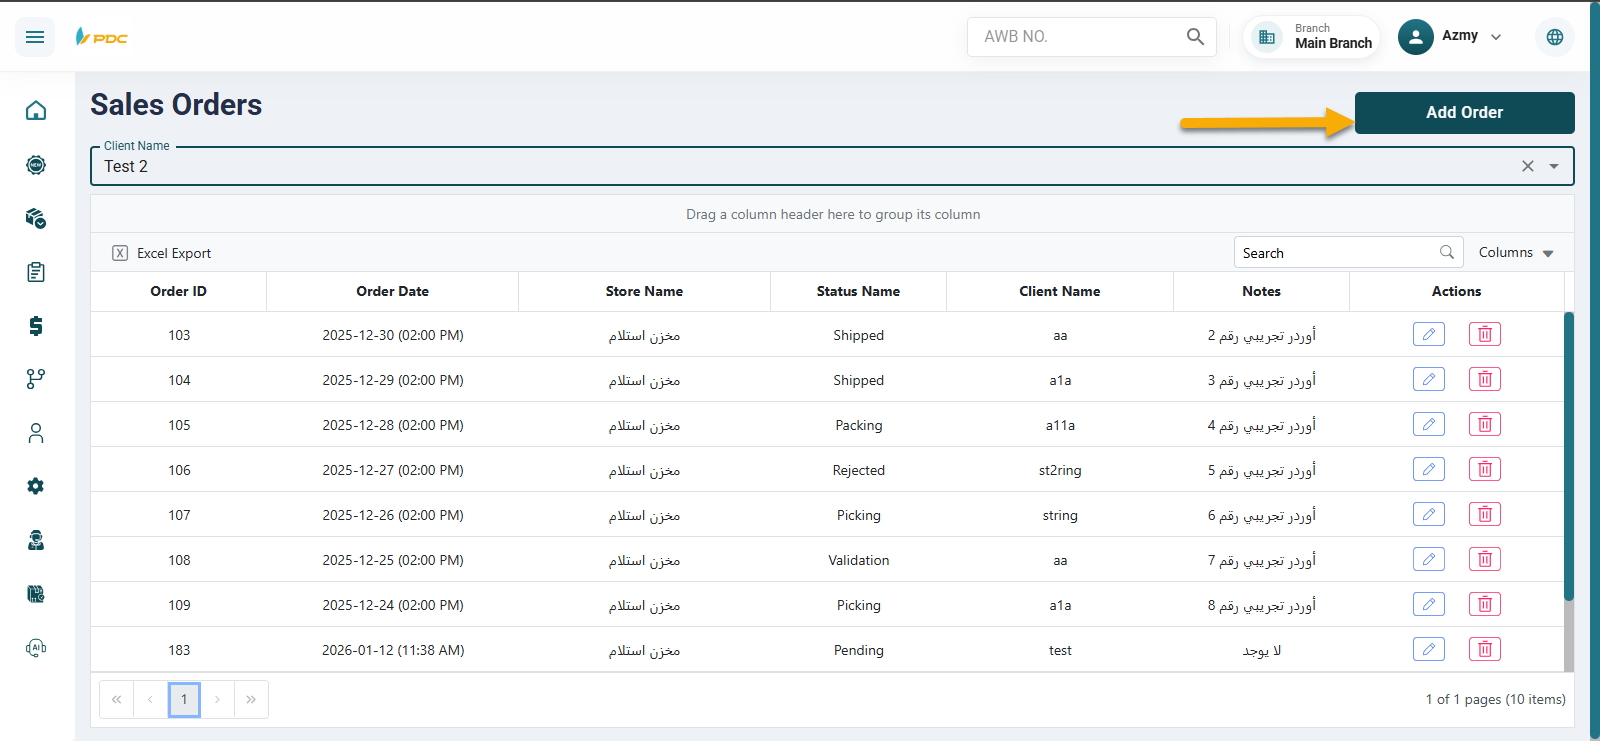
Sales Orders
The Sales Orders screen allows operations staff to create sales orders so that products can be released from the warehouse and start the shipping lifecycle.
Creating a Sales Order
To create a new sales order, the operations staff follows these steps:
-
Click on Add Order.
-
Select the client for whom the sales order will be created, so the order is linked to the client’s products.
-
Enter the client number, then click the search (magnifying glass) icon next to it.
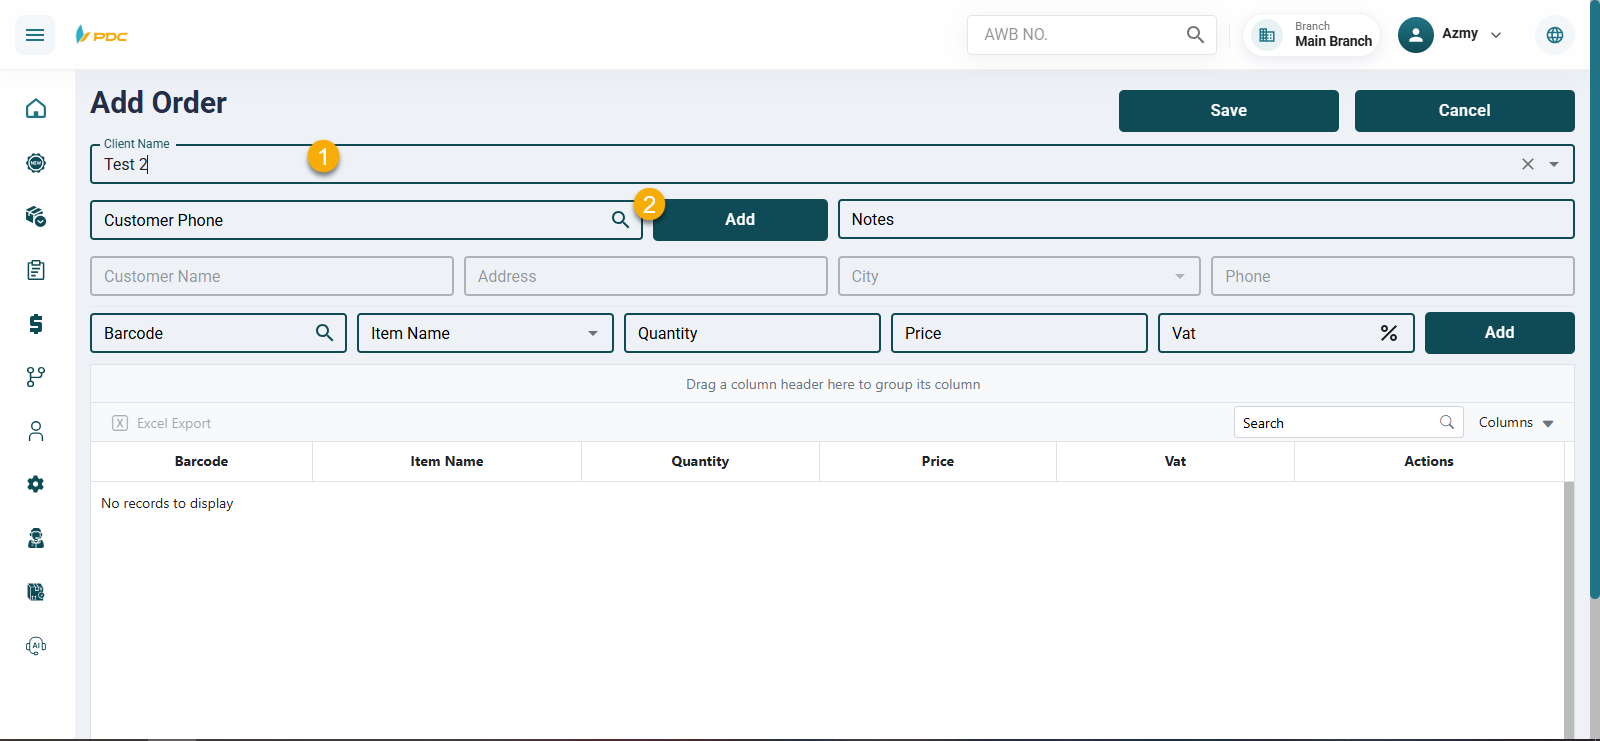
- Once clicked, the client’s data is automatically filled in the remaining fields.
Adding a New Client (If Not Existing)
If the client is not already registered in the system, it can be added by clicking the Add button, which opens a form to register the client in the data registry:
- Select the client.
- Enter the client name in Arabic and English.
- Enter the phone number, which will be used later for searching.
- Enter the email address.
- Enter the address and city.
- Click Save to register the client.
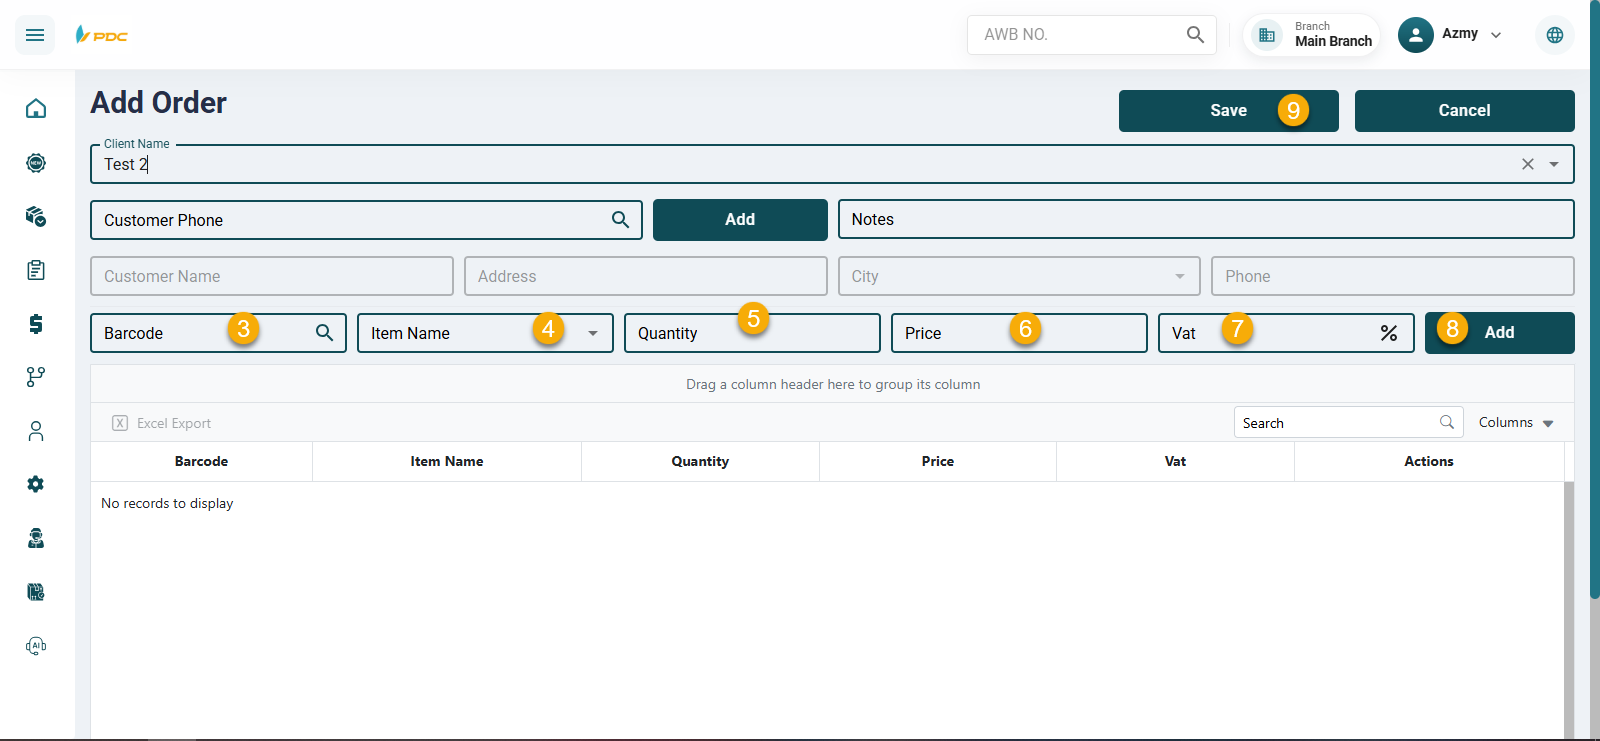
Adding Products to the Sales Order
After selecting the client, the operations staff proceeds to add the products:
- Enter the product barcode.
- Select or enter the item name.
- Enter the quantity to be released from the warehouse.
- Enter the price.
- Add the applicable tax.
Then:
- Click Save to add the product as a sales order line.
- The sales order item appears in the list below.
Confirming the Sales Order
-
After reviewing all added items, click Save again to confirm the sales order.
-
The system allows the user to:
- Edit the sales order.
- Delete the sales order if needed.
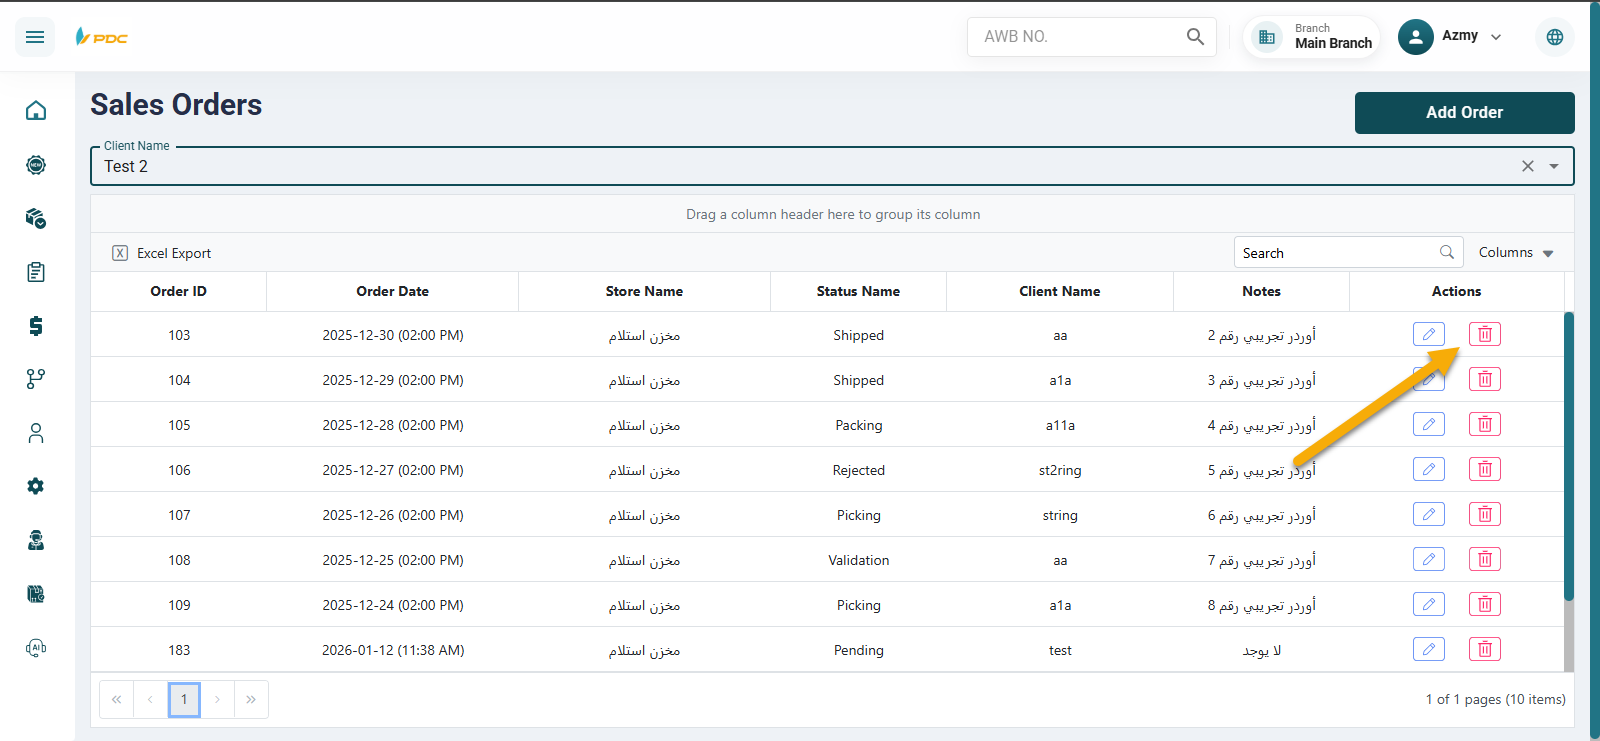
This screen ensures that sales orders are accurately recorded, inventory is properly deducted from the warehouse, and orders are smoothly transferred into the shipping workflow.